

What is Wood oil plus 2c?
Wood oil plus 2ces are often used to clean and shine the surface of these materials. This type of polishing is very effective for removing lines and surface defects, increasing gloss and putting details on the surface. To use Wood oil plus 2c, you can use this best-selling product that is available at the best price in ‘ShimiAfsoon’ store.
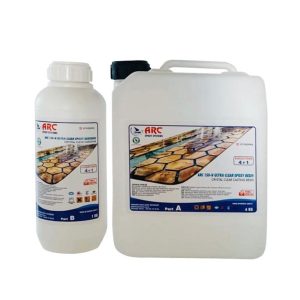
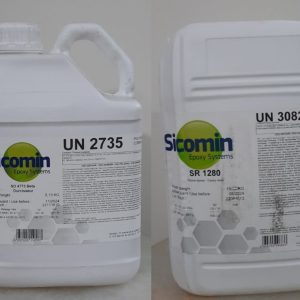
Wood oil plus 2c, two-component epoxy resin – a very transparent solvent type that can be cast to a thickness of 2.5 cm for all layers on an average of 20 degrees, and is suitable for all decorative applications, such as furniture transparent epoxy table, wood coating, epoxy resin cube, electrical LED system coating, jewelry gifts, etc.
Application of Wood oil plus 2cing
Protection and cover in one layer
Protection of wood, furniture, flooring and epoxy resin against wear and scratches
Waterproof and eco-friendly (VOC free)
It does not leave a film layer, does not damage the natural texture of wood and resin.
Easy to use with non-foam structure
Quick dryer

Wood oil plus 2c
How to use Wood oil plus 2c?
To use this type of polish, first clean the surface by removing the peel and then with a special paper called “sandpiper”. Then pour the polish on a soft and clean cloth and continuously use circular movements on the surface and spread the polish evenly on the surface. Finally, wipe the polish with a clean, dry cloth to make the surface shiny and beautiful. Do not apply the product directly to painted or varnished surfaces.
Clean the old polish completely from the surface with a file. Thoroughly clean the surface of any dirt, oil stains, saw dust or old polish residue. Remove the resulting dust completely from the surface with a vacuum cleaner. Wipe the surface with a damp cloth to remove all dust and wait for it to dry.
Uses of Wood oil plus 2c
Solid parquet floor or laminate floor
All interior solid or veneered wood surfaces
Tables, chairs, counters and solid or veneered furniture
All epoxy resin surfaces
Packaging of Wood oil plus 2c
300 grams
Resin: 285 ml A
Hardener: 15 ml B
Durability of polishing resin for epoxy and wood
One year
Characteristics of polishing resin for epoxy and wood
Physical state: liquid
Color shade: Transparent
Drying time: 12 to 24 hours
Hardener composition percentage: 5%
Epoxy resin polishing is used to remove defects, remove bubbles, smooth the surface and even make the desired surface shine. Of course, this is not a difficult task and you can do it more easily with the tips that we have discussed in this article.
What is epoxy resin polish?
Polishing epoxy resin and making it shiny is not difficult at all. With a simple polish, you finalize your resin work piece and make it shine. In this article, we will explain how to create a perfectly smooth and shiny epoxy resin surface in just a few steps and what you need to do.
Which epoxy resin surfaces can be polished?
basically, all hardened epoxy resin surfaces can be polished. It’s especially easy with smooth surfaces like a table top. With small, uneven castings, polishing can take a little longer. This is the case, for example, with custom-made epoxy resin jewelry; But don’t worry, with our tips this too will work without any problem. Depending on the size of the surface to be polished, you can work entirely by hand or use a polishing machine.
Why should we do epoxy resin polishing?
Fixing the bugs encountered during work
Removing remaining bubbles
Smoothing the surface
Destroying beehives
Removing scratches caused due to the passage of time.
Reaching the glassy surface of the epoxy resin
High brightness
Whether you’ve just finished sanding your epoxy or are looking for a deeper shine, read on for these tips and tricks to learn how to best polish your epoxy resin projects. Before you polish, check out our sanding tips so you’re ready to go through the polishing process!
Preparation for buffing and polishing the epoxy resin
Once you’ve checked out your project and removed the mold, you may notice some bugs that you want to take care of. It is very important to remove them before you start polishing the epoxy resin, otherwise you will not get the desired result!
Fixing defects of epoxy resin polish
After you’ve coated your epoxy or casted and molded, you may find out that your project has a flaw—scratches, hairs, bumps, or an uneven coating are all common mistakes that can occur. To fix these defects, sanding is highly recommended. If you haven’t already, make sure you remove any of these flaws before proceeding with the smoothing process.
You want to make sure you have a clean, flat surface to work on when you’re painting. You can do this by using different grits of sandpaper: the smaller the grit, the deeper the scratches on the surface; So, if you want to remove a bug, or smooth out a surface, it’s best to start with less grit and slowly work your way up until the surface is smooth. If your surface is relatively ready and free of bugs, start with a higher sandpaper because the surface requires less work.
Why does my epoxy turn cloudy after sanding?
After sanding, you may find that your surface is smooth but cloudy. And It’s not that glossy finish you put on before. Don’t worry, it’s normal! Sanding leaves small scratches that refract and diffuse the light, and get rid of any pre-existing shine. Your surface will be smooth to the touch, but not smooth to the eye.
Unfortunately, because of its softness, epoxy will be scratched by sanding, knives, sharp objects, etc., but fortunately, you can recoat your surface with a clear coat of epoxy, or you can smooth and polish!
Polishing of epoxy resin with a machine
In addition to polishing by hand, it is also possible to polish surfaces with a machine. For this purpose, sanding machines such as orbital sanders, special polishing machines or drills are suitable. For all machines there are special attachments with which you can also perform polishing. It is highly individual that How useful a purchase is.
investment is worthwhile if you want to polish large surfaces regularly. You can also rent a polishing machine at many craft stores or equipment rental shops. It makes sense if you only need the machine once or infrequently, but in general, polishing large surfaces with a machine is much easier and more pleasant, which saves a lot of time and energy.
For small surfaces, you can also work very well with wet sandpaper and polishing paste. It often works better and more accurately. If you want to work with a machine, a drill with special glue is the best choice.
You should never use angle grinders to polish epoxy resin. They usually do not have speed control; Therefore, there is a risk of overheating the workpiece surface due to high speed.
Epoxy resin polishing – polishing resin and how to do it:
Step 1: Sand the surface.
For example, you coated your table with epoxy resin and the last layer is fully cured? excellent! Now we go to the next step. Epoxy resin sanding begins with wet sanding. All you need is sandpaper, a sanding block and water.
Before you start sanding, wet the sandpaper and moisten it repeatedly during the sanding process. Sanding is done carefully in circular motions. You start with 120 grit, then use finer and finer sandpaper up to 3000 grit. Wet sanding can be done by hand or with an orbital sander. sand the edges carefully and with less pressure, otherwise too much epoxy resin will come off too quickly.
Sanding is finished when your table is smooth and even. Now wipe the remaining water from the table. Now the actual finishing of the epoxy resin can begin.
Step 2: Epoxy resin finish
Your epoxy resin surface polishing can also be done by hand or machine. As explained above, the size of the surface determines which method is most suitable.
Option 1: Polishing by hand (epoxy resin polish)
If you want to sand your surface by hand, you will again need sandpaper, a sanding block, polishing paste, water, and a cotton or linen pad. Then put some polishing paste on the cloth and moisten it with some water. Then place the cloth on the sanding block. Rub the cloth over the surface in slow, circular motions with light pressure. Your polishing is finished when the desired level of gloss is achieved.
Option 2: Polishing with a drill (epoxy resin polish)
If you want to polish by machine, I recommend a drill with a screw-on polishing attachment for small work pieces. There are attachments with special polishing sponges or polishing discs and ball heads. The best polishing compounds are those that are also intended for wood.
Start by screwing a flannel polishing pad onto the drill bit. Then apply some polishing paste to the attachment. Now you can carefully polish the surface with even movements. Be careful around the edges and apply less pressure. After the first polish, you can do a second pass with an even finer flannel glue. Once you’ve achieved the desired shine, you’re done.
Option 3: polishing with a polishing machine (epoxy resin polishing)
Large areas can be polished quickly with a polishing machine to have a high gloss. Random orbital sander with polishing attachment is the first choice for epoxy resin surfaces. Due to its unusual movement, you will achieve a perfect polishing result without removing too much resin. To do this, apply some polishing paste to the polishing pad on your sander. Turn on the device and move it in circular motions with light pressure on the surface until the desired gloss level is achieved.

Reviews
There are no reviews yet.